


How to Create Engaging Training Videos for Employees

Written by:
Orana Velarde

Video is the number one content marketing strategy right now.
On June 30, Adam Mosseri, the head of Instagram, said that they’re no longer a square photo-sharing app, and that they’ll be concentrating much more on video from now on.
This change only reinforces the fact that video is the biggest contender in the content consumption space. If you don’t get started with video today, your brand will fall behind — it’s that simple!
To help you get started, we’ve put together this comprehensive guide on how to make a video. In this step-by-step article, you’ll learn all about:
Ready to make your video? Let’s jump right in.
If you want to skip the tutorial, you can create a video in Visme right away. Make animated videos, explainer videos, video ads and more. It’s fast, easy and works in your browser!
Step #1: Decide the Type of Video to Create
Step #2: Choose a Topic for Your Video
Step #6: Shoot Your Video Footage
Step #8: Preview and Make Final Edits
The first step of any creative project is to figure out what you want to make. Since, in this case, we’re talking about videos, you’ll need to figure out what type of video you want to create.
To choose the right video type, you’ll have to identify the purpose of your video. Why are you creating this video in the first place? What do you hope to achieve with this video?
Some possible goals for making a video can be:
Let’s consider a few examples to help you understand this better:
Let’s look at some of the most common types of videos and some examples for inspiration.
An explainer video is a type of video that aims to explain something to the viewer. How-to and tutorial videos also explain something, but the difference lies in the details.
Explainer videos tell a story to explain a concept, or visually demonstrate an idea or analysis. Tutorials and how-tos, on the other hand, give instructions on how to do a specific thing.
Here’s an example of an explainer video from Asana:
Explainer videos are great for explaining a brand concept or showing how a company’s offerings solve specific problems. These are high, top-of-the-funnel content types that help increase brand awareness and form initial visual contact with the consumer.
You can create an explainer video in different styles; live-action, animated or a mix of both. The animated video style, however, has been particularly trendy the past few years, especially among small businesses and SaaS companies.
The best place to use a video is a landing page that showcases your brand or product. Landing pages are where new customers and audiences find products or services they’d like to try.
An explainer video on a landing page is the best way to let them know what the brand is about while telling a story they can relate to.
You can also share your explainer video on YouTube, Facebook and other social media platforms, with accompanying copy that speaks to the people at the top of your funnel.
Below is an explainer video template from Visme you can use for your own business.
There’s no better way to explain how to do a specific task or activity than with an educational video. In 2020, 82% of global viewers used YouTube to learn a new skill or hobby. How? With tutorial videos, of course.
Here’s an example of a how-to video from B&Q — a company that sells DIY home improvement products.
The best how-to or tutorial videos are easy to understand and follow along with. If it leaves the viewer confused, your how-to video will be a bust. Take your time with the planning phase of these videos; they have the opportunity of getting you lots of subscribers and potential clients.
Tutorial videos are great for both new and returning clients. Here are some examples of how brands, companies or individuals can create tutorial videos.
If there’s anything you offer that could warrant a tutorial video, you should consider making one. When the same “how-to” question is asked frequently to your customer success specialists, make a video answering the question and showing how to do whatever they need help with.
Here’s a product tutorial video template you can use:
Brand awareness videos are similar to explainer videos, but go one step further. Like an explainer video, a brand awareness video tells a story. But unlike the explainer, it delves more into emotional territory instead of showing how the brand solves a problem.
Here’s an example of a brand awareness video from Dove:
Unlike an explainer video, this video focuses on the concept of self-love and perception. While this video doesn’t talk directly about Dove and its products, it helps build and strengthen Dove’s image of a caring brand that values authenticity and promotes self-esteem.
The story a brand awareness video tells is more about how the brand makes the user feel than what the brand does. This can be done with emotional storytelling that shows how the brand can change a life, a perception or an idea.
Think of it this way — brand awareness videos break barriers between advertisement and storytelling.
Brand awareness videos are sometimes used as advertisements, where the brand name only shows up at the very end. Or, it can be a social media video of how a brand is helping change something that is systematically wrong. It can also be an emotional documentary of a conducted study or a fictionalized situation that makes you think twice.
Use brand awareness videos once your brand is established and is easy to recognize just from the logo. These types of videos are better suited for customers who are already aware of your brand, and have the potential to become loyal and emotionally connected to your brand.
These people are more likely to share your brand awareness videos with their friends. If done well, your video might even go viral, and maybe an online publication will pick it up and share it in an article.
Since brand awareness videos can help build, enhance or even break down your brand image, they should not be created lightly; they must be timeless, essential and relevant.
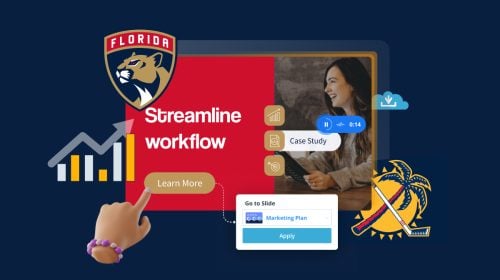
The sole purpose of an advertisement video (or video ad) is to convert. The visuals, the copy, the story and the sounds must all be selected with one thing in mind — selling.
Regardless of what you’re promoting on the ad; a free webinar, a new product or a sale, the idea is that people will see it and click on the link, or scan a QR code.
Here’s an example of a video ad from Apple:
The action Apple wants you to take after watching this video ad is obvious — click on the link in the description, learn more about the product and possibly buy it.
Depending on the platform you’ll share it on, an ad video can be as short as 15 seconds or as long as a couple of minutes. A TV commercial is usually around 60 seconds, a social media ad around 15 seconds, a YouTube ad is about 20 to 30 seconds.
Video ads are essential for sales and promotions. Online ads already cost money to publish, so why not make them truly eye-catching? That’s where videos come in. According to DataBox, 60% of marketers have found that video ads do better than static ads on Facebook.
Video ads are perfect for YouTube ad placements and TV commercial spots. These might cost a bit more than a Facebook ad with a small target audience, but they will get you more exposure.
Simply put, if you have something that needs promoting, create an advertisement video for it.
Below is a bite-sized video ad template you can use for your own brand. Customize it, download it and share it on social media.
Pro-tip: Looking for more video ad templates? Head over to our template library and browse options for Facebook video ads, Twitter video ads, Instagram video ads, bite-sized video ads and more.
Testimonial videos are an excellent way of using customer feedback and going beyond the ordinary. A video with actual footage of the person talking will have more impact than a graphic with a quote in it.
Here’s an example of a testimonial video from HubSpot:
There are a few ways to grab content for testimonial videos:
Even if you can’t get your hands on actual footage or audio of your customer talking, you can always turn their written reviews into testimonial videos.
How? By using animated testimonial video templates like the one below:
You can use testimonial videos at any point in the customer journey or funnel. At the top of the funnel, you can include them in landing pages.
Further down, they can be inside emails. And even further down, customer success specialists can send the testimonials to prospects about to sign a huge deal with you.
Training and onboarding videos do just that — train and onboard new employees. These are not videos you create for marketing or brand awareness; they’re for your staff and new hires. Training and onboarding videos highly resemble tutorial videos with a more human element.
Here’s an example of an onboarding video from Grubhub:
The video above was created to onboard new drivers. It’s a great example of how you can help new employees familiarize themselves with the SOPs in a non-boring, personalized sort of way.
These videos will help your company thrive from the inside out. You’ll need onboarding videos for new hires and training videos for both new and existing employees, depending on their skill level.
You can show these videos during onboarding sessions, training sessions, seminars and workshops. You can also distribute them digitally via email, or embed them on your website or portal for new employees.
All the videos above have some sort of purpose, such as marketing, brand awareness or internal communications. But let’s not forget the videos that are purely for entertainment.
These include vlogs, behind-the-scenes clips, animated quotes and even TikTok dance videos!
San Diego Zoo, for example, posts entertaining videos of animals on TikTok that people love to watch and share with their friends:
@sandiegozooSend this to someone with no context #hello #hi #parrot #animals #sandiegozoo♬ original sound - San Diego Zoo
If done well, entertainment videos can also help you generate brand awareness by getting more eyeballs on your brand and social media profile — especially if your funny or entertaining videos go viral.
Use entertainment videos when what you need to do is entertain — it’s that simple.
These videos are also great for beginners just getting started with video production and want to practice creating a great-looking video. Brands usually publish entertaining videos on social media platforms like TikTok and Instagram stories.
A video presentation is essentially a slide deck turned into a video. Turning your presentations into videos is a great way to make them more shareable and engaging.
For example, Visme creates video presentations by combining slides with a live-action speaker that walks the audience through design tips and tricks.
People would rather watch a 3-minute video than flip manually through an embedded slideshow, especially if there are animated elements, cool transitions, GIFs and other elements on the slides.
Video presentations are ideal when you want to share a presentation with someone but want to make it easy to see. With a video presentation, you avoid the hassle of having to go slide to slide.
Brands can also make video presentations as educational content that’s more engaging than a normal PowerPoint presentation or a boring lecture.
Here’s a video presentation template you can use:
Not exactly a full video type, but something to consider are intros and outros. These are the clips that open and close your videos. They carry your branding, message and personality.
Here’s an example of a video intro template in Visme:
You can make all your videos have the same intro and outro template and only change the title of each video. If you already have finished videos but want to revitalize them, add new intros and outros.
When creating videos for YouTube, you’ll need intros and outros. Most specifically, outros with YouTube format for adding related videos and subscribe buttons.
Here’s an example of a video outro template in Visme:
Great, now you know what the purpose of your video is and what type of video you’ll make. The next step is to start looking at the details, most specifically the topic.
Let’s use the same examples as above:
Make sure you pick a topic that your audience actually wants to watch a video about.
You can dig deeper into your audiences’ needs by listening to social media conversations, checking out competitor content and identifying gaps, conducting surveys, and analyzing your own sales and previous marketing campaigns.
The topic you choose for your video will be the basis for all the content that will need to be laid out as preparation, like the script and the visuals.
But there’s one more step before we get to that — choosing the video style.
After deciding on the video type and topic, it’s time to choose the best style for your video. Does it have people talking or acting out scenarios? Or is it animated characters playing out a story? Maybe it’s a claymation video like Wallace and Gromit.
The video style you choose must be relevant to your story, visual brand voice, and audience. Many videos in most of the types mentioned above use a mix of different styles.
Most commonly, live-action is mixed with animation or motion graphics. Screengrab scenes need live-action support scenes, and the list of combinations goes on endlessly.
There are no rules to what level of video style mix your video needs, just make sure it follows a storyline from beginning to end, makes sense, and the transitions are smooth.
Let’s take a look at each video style and some examples.
Live-action videos are those that have people in them — for example, re-enactments of events, interviews or footage of a person doing something while they explain it.
Here’s an example of a live-action video:
Some types of videos are best with live-action instead of animation. These include cooking videos, exercise and workout videos, personal interviews and tutorials.
Animated videos can be made in any of the various animation styles, but the two major types of animation styles include 2D and 3D animation.
2D animation is technically flat but can have a feeling of depth with textures and shading. Here’s an example of a 2D animation video.
3D animation is more like motion picture animation in that it mimics reality but is animated. Below is an example of a 3D animation video.
When it comes to selecting with animation style to use, it usually comes down to cost. 2D is less expensive than 3D and also takes a lot less time to achieve.
Stop motion is a style of animation that’s done with physical objects that move around in a scene. The trick to stop motion animation is to take a photo per minimal movement of the object; then, when you put them together, it seems to be moving.
Here’s an example of a video that uses the stop motion animation style:
Stop motion styles are done with regular items that seem to move on their own. The smoothness of the motion will depend on how many photos or scenes you take before putting it all together.
Using this technique, animators can also create characters with clay and make them move and interact with each other to tell a story.
Use stop motion or clay motion only if your brand style has a fun and easygoing angle. Corporate videos might not be the right opportunity for stop-motion.
Another animation type worth mentioning is motion graphics. These are animated elements on a scene that support the audio context, but don’t tell the story themselves.
Here’s an example of a video that uses 3D motion graphics:
You can do quite a lot with motion graphics and turn a seemingly boring presentation into a visually engaging experience for your audience.
Video screen recordings are common in tutorial videos for tasks done on a computer. The same applies for gaming videos. When the viewer needs to see your screen to understand what you’re talking about, you’ll need to take screen recordings, or screengrabs.
Here’s an example of a screen recording video from Elegant Themes:
Once you’ve recorded your screen, you can upload the screengrab footage and edit it with other scenes like you introducing the video or an animation opener. Up to you!
Screen recordings are mostly used for tutorials and walkthrough videos as they help the viewers understand and replicate the exact steps or actions needed to solve a problem or complete a task.
Not every video is made up of only animation or only live-action — sometimes, they are mixed.
Here’s an example of a video from Dollar Shave Club that uses mixed media — live-action, text, images and motion graphics.
There are different ways to mix media in a video, such as:
Using mixed media is a great way to improve the effectiveness of your video, change the pace and keep things engaging throughout.
The next step is to write the script for your video. This will be the master document that includes everything that will go into the final project. The depth and complexity of your script will depend on what type and style of video you’ll be making.
Here are some tips on creating an effective video script:
Scripts are not just a story put on paper so that it can then be turned into video. It’s also about how you want to tell that story. This means you need to have directions for the animator, videographer, actors and anyone else involved.
Include explanations about how you want the scene to look or how the people should be dressed. If you’re making the video on your own, you’ll still need some direction to help you while creating it.
For example, let’s say you’ll be making an animated ad for Facebook. What do you need to have ready before you start?
But…
All these details need to be in the script.
Let’s take another example; this time for an interview-style video. What are the things that need to be in your script?
But…
Remember to include as much relevant information as possible in your script. This will give you direction on how to shoot and edit your video later on.
Your video should tell a story with a beginning and an end — the script is what outlines that story in a scene-by-scene format. Use storytelling tactics to help you format the content in a way that will flow and be easy to understand.
Check out our video above on presentation format styles. It's all about using storytelling techniques in presentations, and the same concepts apply to videos.
A script is no place to get over wordy or fluffy. The idea is that your story is told succinctly and to the point. If there are people that have to act things out in the video, write what they need to say or do in detail.
Inject an entertainment factor into your script. If you don’t grab the attention of your audience in the first two seconds, you’ve lost them.
The story in your video needs to show off your brand personality. This applies to everything in your video, from the copy to the background music.
As you’ve seen above, the script is made of both the story and the instructions. That’s why it’s best to format it as an outline, with every section being a scene.
For example, this is what a script may look like for a cooking tutorial video:
You get the idea.
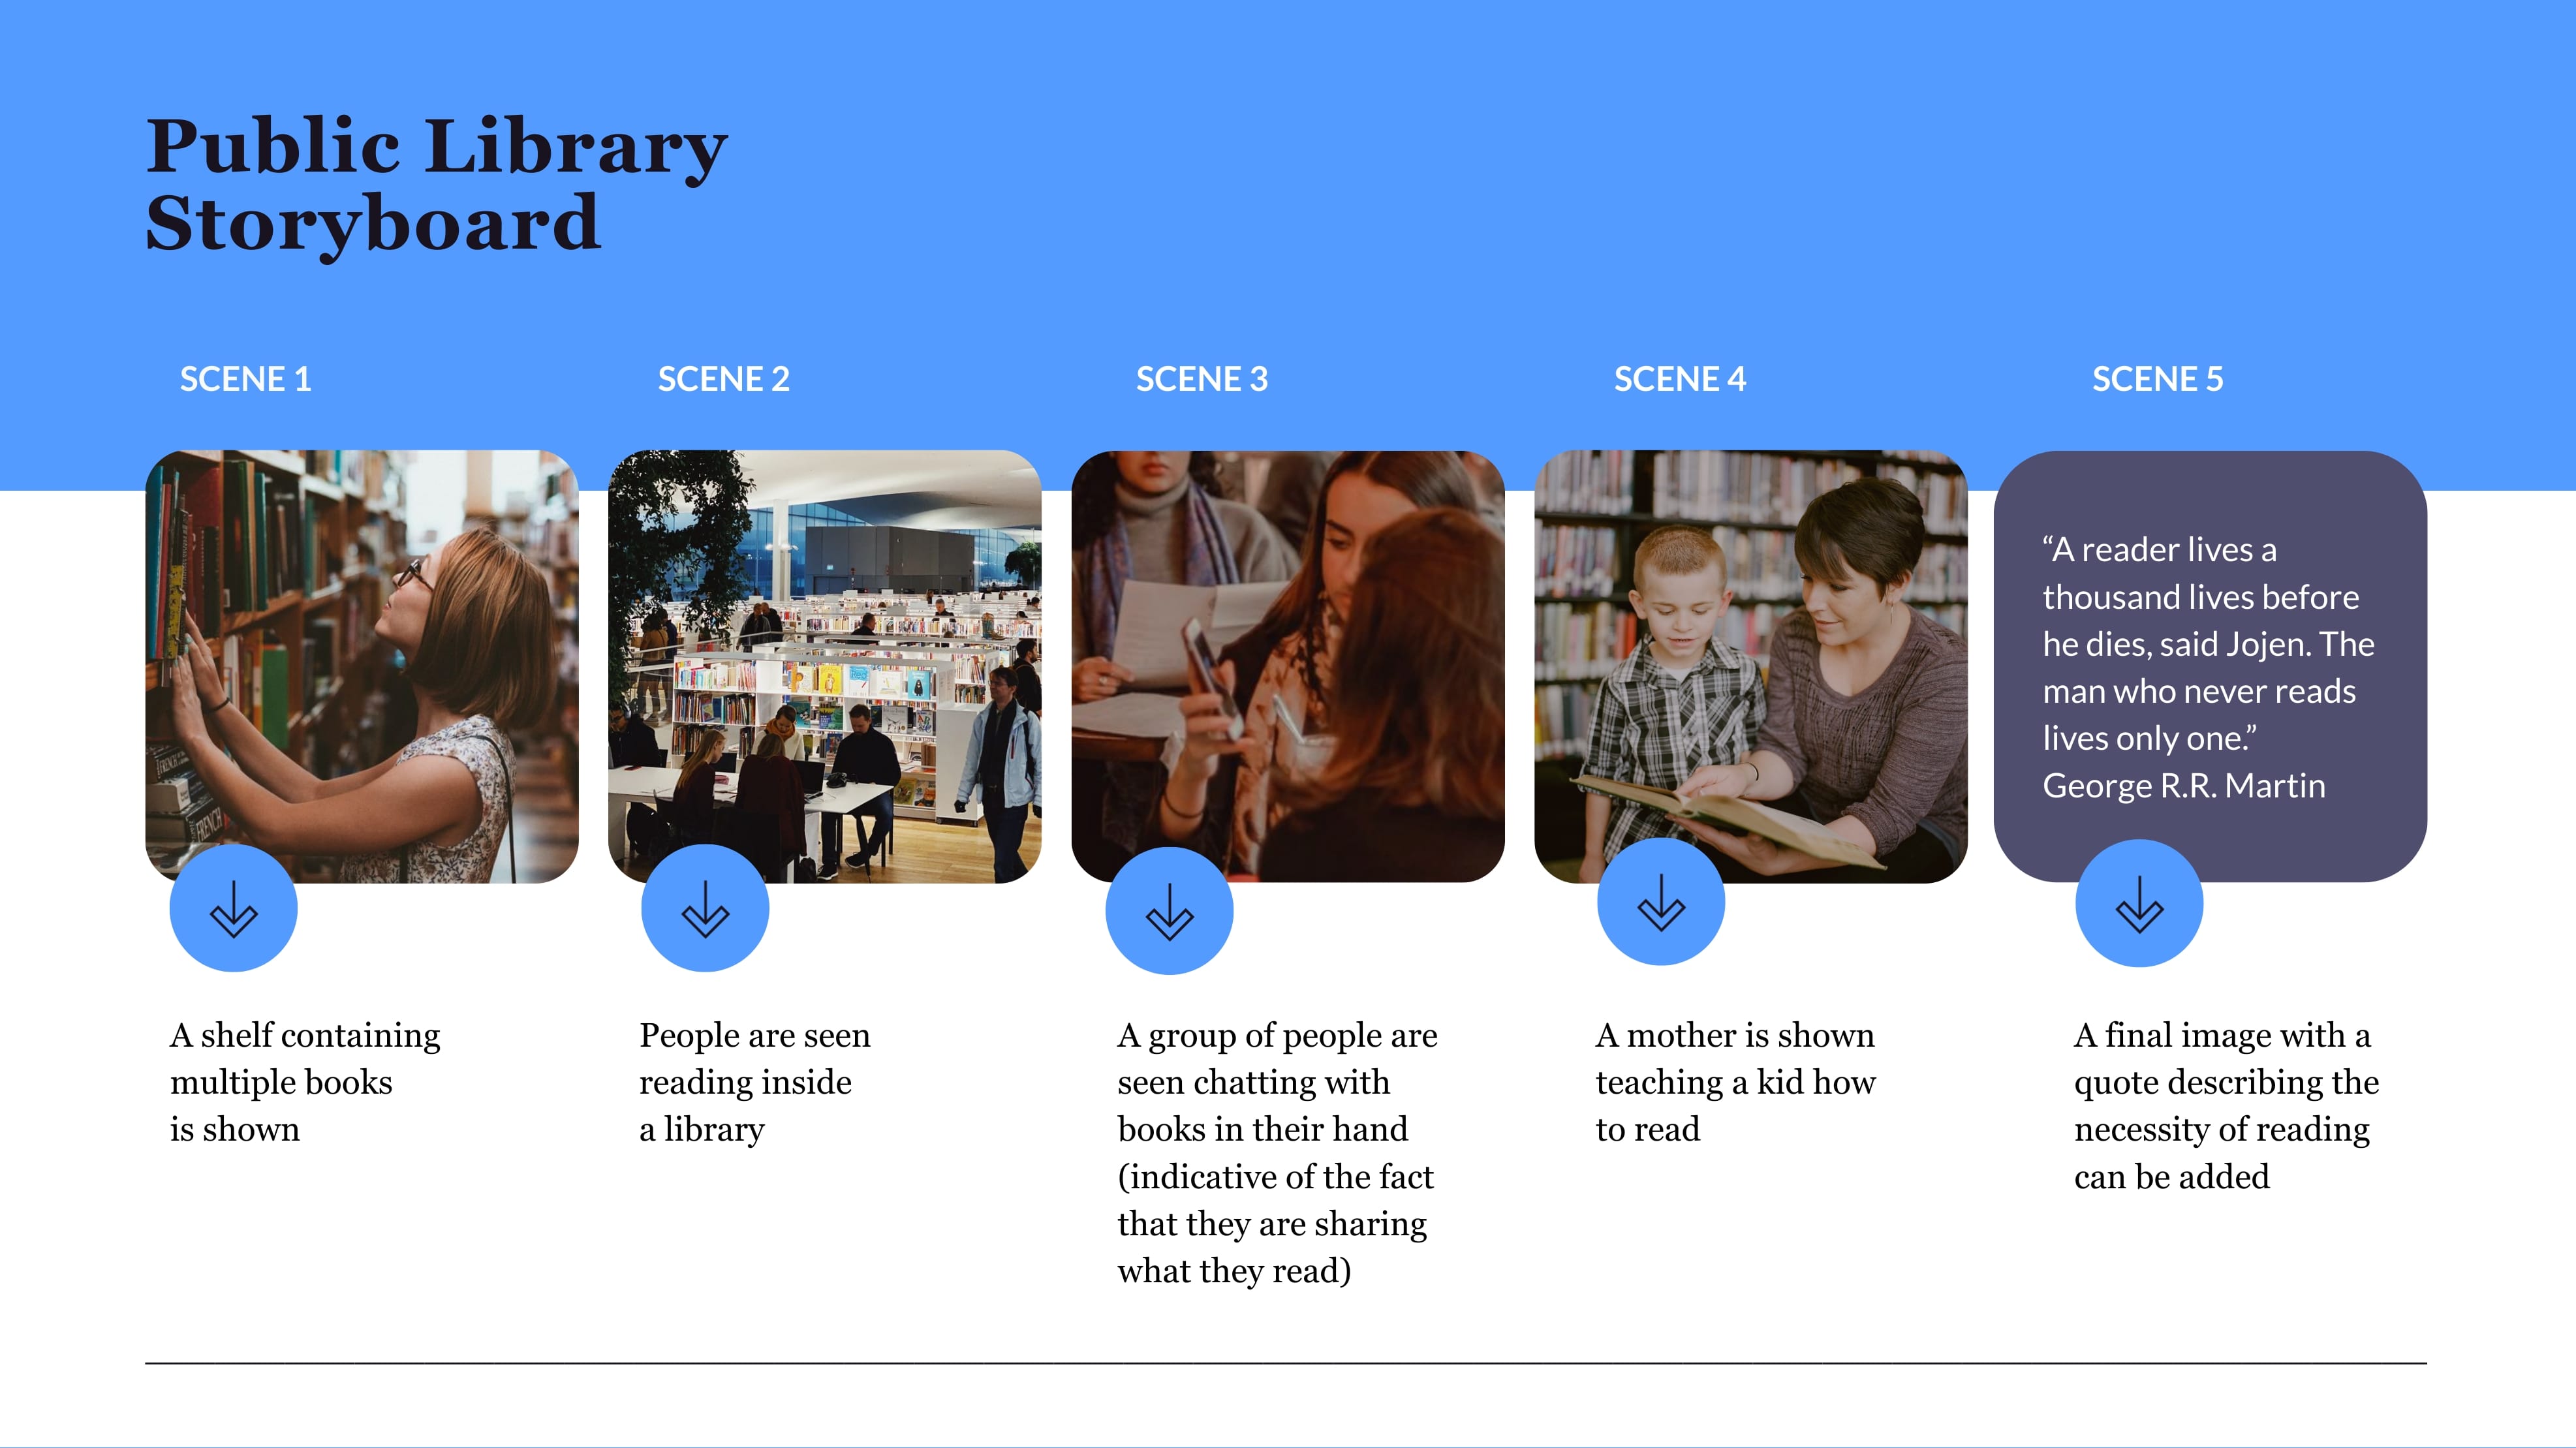
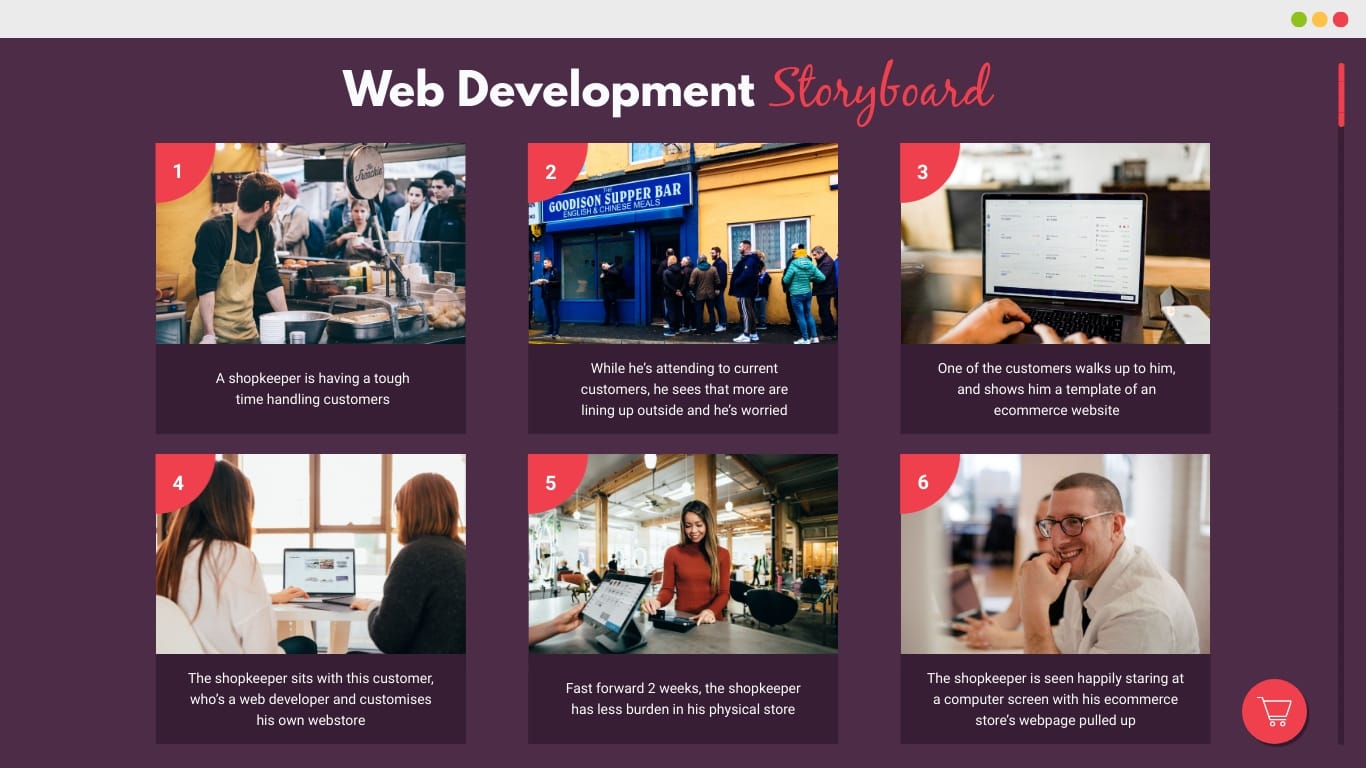
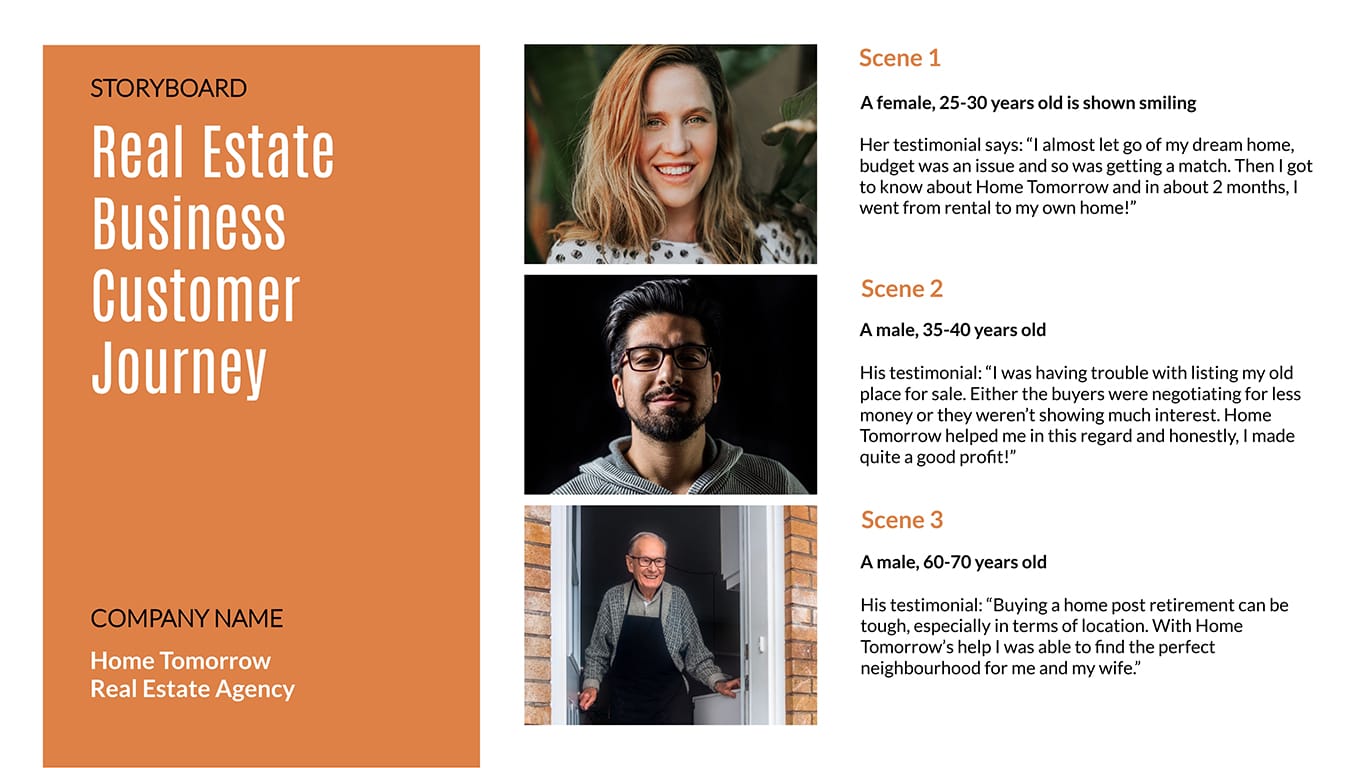
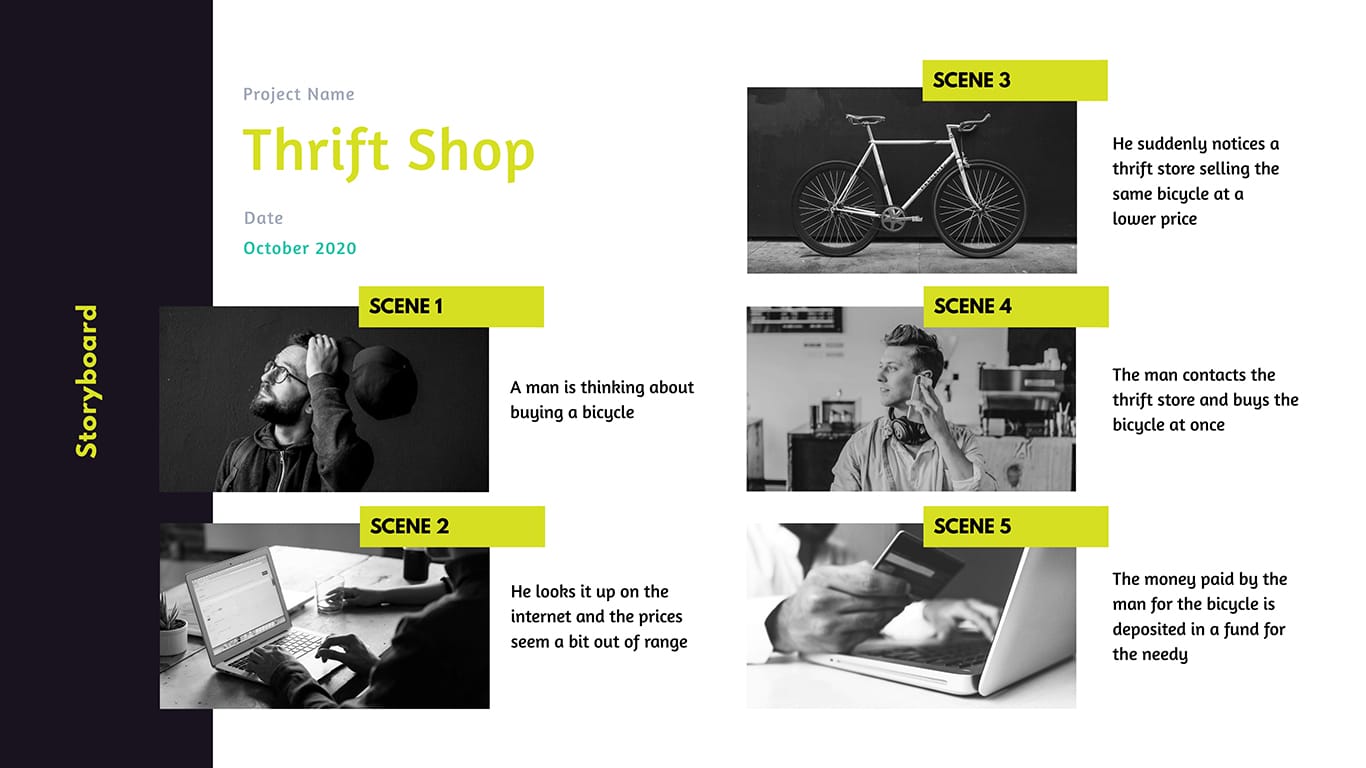
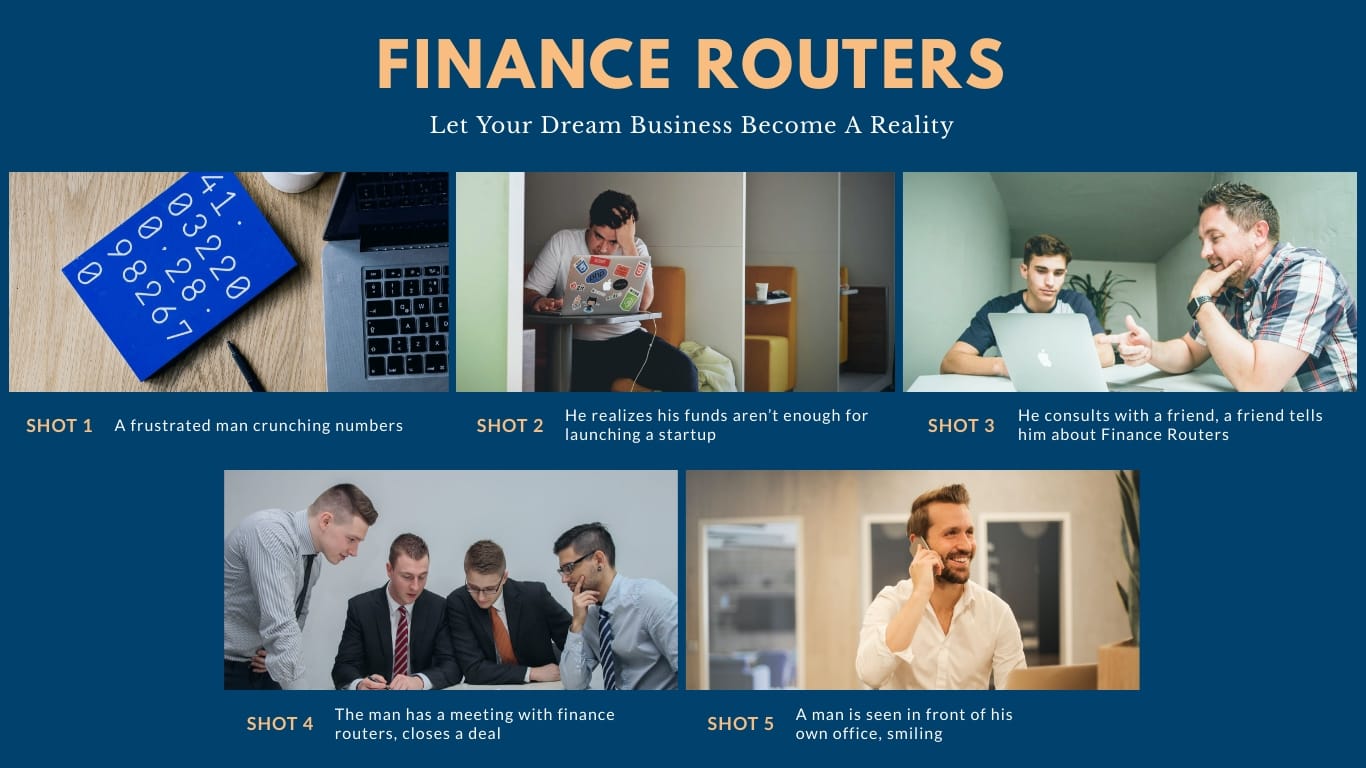
With the script in hand, it’s time to start visualizing a storyboard. A storyboard helps to start visualizing what your video will look like when it’s finished. Think of it as the first rough draft.
You’re probably making a video on your own or with your team, and Visme has storyboard templates to help you out.
Remember, storyboards are not meant to be overly designed or produced; they are practical tools to help you out when it’s time to make the actual video.
Suppose you need to present the idea of your video to stakeholders before actually making the video. In that case, you can brand the storyboard and put a bit more effort into the design. When presenting at the meeting, Don’t forget to use your storytelling skills when pitching your idea!
This step is for videos that include live-action footage of people talking or playing out scenes. The same applies for stop motion videos.
When recording your video footage, avoid long takes. Create clips of a few minutes each at the most; this will make it easier to trim into scenes later.
Use the storyboard to help you shoot the scenes in order. If the scenes aren’t recorded in order, take notes of the order you record the scenes to avoid confusion later.
Take a cue from the film industry and use a “clapperboard” to show the camera what scene you’re about to shoot.
You’ve done all the preparation work, and now it’s time to put it all together. The best part, in my opinion, is editing your video.
You can take any kind of footage you have and turn it into an engaging experience for your audience simply by using the right editing tools and techniques.
Let’s take a deeper look at the all the nitty gritties involved in editing your video:
The first thing you’ll need to make your video is the right tool or software. There’s plenty of options at different levels of complexity, ease of use and cost.
Pro-tip: Check out our video editing software comparison guide if you’re looking for options and want to compare features and capabilities of some popular tools out there.If you want to save time and get started straight away, try Visme.
Visme is a full-fledged design workshop where you can make videos plus all other visual assets you and your brand could ever need — social media posts, documents, infographics, presentations, flyers and more.
In the following sections, you’ll discover how to make a video with any tool, but we’ll give you insider tips on how to do it with Visme. We’ll go step-by-step from uploading the content, putting it all together into scenes, to animating and finalizing your video.
Once you’ve chosen a video editing tool, the first thing you need to do is get organized.
You’ve already got the script and storyboard to help you follow a process and stay true to the story you want to tell. Now, it’s time to organize any raw footage, audio or photos that you want to include in your video.
Put together everything into a folder and make sure you’ve named the files so they’re easy to identify and distinguish from each other. Video asset management software can come in handy at this stage, as it allows you to easily organize and search for all the videos (and their revisions) that you've stored.
Pro-tip: No content? Don’t worry. There are plenty of free stock videos and photos to choose from inside Visme, making it even easier to create a video quickly and easily.
You can start creating your video from scratch using a blank canvas, or start with a pre-designed template. Most tools have ready-made video templates to choose from, including Visme.
Our designers have created a wide variety of video templates for you to use if you’re looking to get a head start on the design. Select from ads, explainer videos, listicle videos, social media videos, testimonial videos, intros, outros and more.
When selecting a template or even a custom size blank canvas, you need to make sure you’re starting with the right dimensions, or aspect ratio.
The aspect ratio of a video or graphic is the shape it has, independent of its size. This will depend on where you plan to publish and share your video.

The graphic above shows you the optimal aspect ratio for some popular social media platforms. Using the right aspect ratio is crucial as it can impact user experience and ultimately the success of your videos.
For example, you might need a horizontal video for YouTube, but for TikTok, Instagram Stories and Instagram Reels, you’ll need vertical video.
To create a video efficiently, you’ll have to upload all your content into the tool first. That way, you’ll have everything on hand to start editing.
Inside your Visme editor, you’ll notice an icon titled ‘My Files.’ Click on it and start uploading the video footage, audio and photos that you want to include in your video slides. Make a folder with the title of your video and place all the new files in there.
Once everything is inside Visme, all you need to do is drag and drop it onto your video canvas from the left-hand sidebar.
Videos, like movies and films, are made up of scenes. When editing a video, you go scene by scene, making sure they tell your story correctly.
Some tools have timelines that show the complete video; others show timelines per slide. For tools with one timeline, you’ll have to insert all your clips in the correct order.
In Visme, the right-side vertical bar shows your project slides in order from top to bottom. Each slide represents a scene in your video.

Here’s a simple rundown of the essential scenes to include in your video:
The slides should mirror your storyboard, so if you’re using a template, there will be some adjusting on your part.
For the slides that aren’t in the template, duplicate one and move things around to make it a bit different from the original. Otherwise, just add a new slide where you need it.
With all the footage or photographic content uploaded to your media library, you’re ready to start building the scenes.
Now, it’s time to add videos and photos to your video. In tools with one timeline, add all your content in the order it will appear.
In Visme, go inside each slide and open your files folder. Click on the content you want to place on that slide and adjust. If you don’t have video footage or photos, or need more, you can always browse our large visual assets library.
Every video clip, yours or ours, has customization options in the top bar under ‘Settings.’ The options include:
If you have footage of live video, interviews, recorded scenes or videos from our library, you’ll likely have to trim extra bits that you don’t need. The same applies to any video clips you selected from the tool’s video library, if it has one.
In your Visme editor, click on the ‘Trim’ button on the top menu, ensuring the video in the slide is selected. Once you click the button, a timeline will appear at the bottom of your screen. Throughout the editing process, you’ll be able to use this timeline to control videos, animations and transitions.
Some of your slides will have only video, and maybe some graphic elements layered on top, but other slides might be different. For these slides, you need to sort out a background.
In Visme, backgrounds can be a single color or one of these other more creative options:
A background can also be a video. Consider having a color overlay so the background doesn’t interfere with the content on top but still keeps things interesting on scenes that could otherwise feel too static.
Next, add all the text you need in your video. Remember that this will be a video, so don’t overload the scenes with text. Try adding text in a large style so it’s easier to read and don’t forget the most important font pairing rules:
In Visme, to make this process faster, you can use content blocks from the left-hand bar in your editor. You’ll find them under ‘Basics’. The options include:
Included in that toolbar is a folder where you can keep your own custom content blocks. You can create these any time you’re working on a project, and a group of items is worth keeping to use again in another project.
After finishing the text, it’s time to add relevant design elements. Some tools offer a variety of design elements, while others will need you to upload them. Add these design elements to your video timeline and adjust with the rest of the content.
In the graphics tab of your Visme editor, you’ll find plenty of shapes, icons and illustrations that you can customize to match the colors and visual feel of your video scenes.

Plus, you can also access a wide selection of animated graphics. The most fun are the animated characters, from humans to robots and even cartoons.
All of them are customizable in terms of color, pose and repetition of animation. Use them as small supporting characters or turn them into the main element of the scene. Anything is possible!
Additionally, there are animated icons, illustrations, shapes, gestures, special effects and avatars. Every single one is customizable in terms of color and repetition of their animation.
Use what you need to tell your story and add visual richness. Just don’t overdo it.
Before you move on to the next steps, take a look at the colors on your video. Are they well-balanced and harmonious? Is every design element in the same color palette?
In Visme, you can change the colors on your slides by using the theme color tool. If you need a color theme that isn’t there, you can create a new one in the Brand Kit. For example, a color theme with your brand colors would be perfect.
Otherwise, you can change the colors manually until you’ve reached a good color balance. Either way, stick to a color palette made up of at most seven colors on all the slides.
Now it’s time to concentrate on the animations in your slides. Check the timing of each movement, adjust the flow between animated objects and create a good visual balance to tell your story.
If you use the animated elements that come built-in with Visme, you can adjust their animation settings like repetition and speed. For characters, you can also select a pose, such as waving or happy jumping.
To animate text or any other element that is static on the screen, click on the ‘Actions’ button and use the custom animation controls along with the timeline to make it perfect.
Use the ‘Present’ button on the top right to check how the animations will look in the finished slide. Make sure everything flows smoothly and isn’t jerky or off place.
The next step after the animations is to edit the transitions between scenes.
In Visme, you can choose from a selection of transition styles or select ‘none’ to build your own with customized entry and exit animations for the elements on each slide.
You can also adjust the timing for the transitions. For the slides with a video in them, choose ‘After video play’ or a specific amount of time. You can apply one transition to all slides or to specific slides you’re working on.
One proven way to make your video more engaging is to add audio in the background. Tapping into both the auditory and visual senses of your audience simultaneously can help you deliver your message more effectively.
There are a couple of different ways to add audio to your video with Visme. Let’s take a look at each one in detail.
Add a background music track to your video to give it depth and “set the mood.”
Adding background music is a good idea when you have lots of slides with animated text effects and no scenes of people talking. This option is for adding one music or audio clip to the entirety of the video project, meaning all your slides/scenes at once.
You’ll find this option in the hamburger menu on the top left of the editor, under ‘Publish Settings’ and then ‘Sound.’ There’s several customization options inside this tab. From volume controls to fades and timing.
When you have background music, it will play underneath any other sound clip or video with sound that you add to any slide.
Your other option is to add sound clips or music to specific slides. Upload your own or use one from our media library. To add it to your slide, click on the selected clip. You’ll find customization options in the gear icon when you hover over the clip on the list.
To trim the audio clip, use the timeline at the bottom of the screen. Use the drag bar in the green audio file to set the trim of the audio. Click and drag the section to fit in the part of the slide that you want the audio to play. You can have one audio clip per slide.
In Visme, you also have the option to record a voice over. You can only have one audio clip per slide, so if you record a voice over, you won’t have any music underneath unless you’ve added a background music clip to the entire project.

To record the voice-over, click on the microphone icon on the bottom left of the timeline and speak into your microphone. The editing options are the same as an audio clip. You can trim the voice-over, customize the volume and the fades.
You’re almost done!
Before you move on to the final step, you have to preview and edit your video to make sure it’s the best it can be. Watch it with your team members and take notes on things that need improvement.

For easily documented edits, use Visme's collaboration feature. Share the project with a team member and they’ll be able to edit things themselves or leave comments and annotations.
Next, make all the necessary edits and you’re ready to share.
Congratulations, you’ve just created an awesome video that you can share with your audience and make an impact. Let’s take a look at all the different ways that you can share your video.
There are two main options in your Visme editor when you create any project; video or otherwise.
But there are also other ways to share your video, such as sharing it in an email or on your favorite social media platform. Let’s look at all your options in detail.
Your first option is to download your video.

Visme lets you download your video as an MP4 or HTML5 file. Once you do, you’ll be able to do whatever you want with it, including uploading to YouTube or presenting offline in any browser.
There’s another option apart from downloading that you might not have thought of. I’m talking about sharing your video as a live link.
Live link sharing is Visme’s best distribution feature for several reasons:
To share on YouTube, you’ll have to first download the video as an MP4 file. You can then easily upload it to your YouTube channel.
Screenshot of a share of one our YouTube videos:
When sharing on other social media platforms, you can either upload the MP4 file, share the YouTube link or even better, share a Visme live link.
Sending an email with a video in it is great for engagement. The way you add a video to an email will depend on your email provider.
At Visme, we often embed videos into our email newsletters.

Your options include a YouTube link embed, an MP4 upload, a Visme live link or an embed code provided by Visme. Whichever you choose, test it first on different browsers and mobile devices. And then select the best one for your audience.
One more option for sharing your video is to embed it directly into your website. Once you’ve published your video to the web inside the Visme share options, you’ll be able to grab a snippet of code. This code will embed the video into your site.
This video works just like a live link; if you change anything in the original project, it will also reflect in the embed.
If you ever considered that you needed to get started with video but weren’t sure, now is the time to take action. Video marketing has become the top content strategy for every layer of your marketing funnel.
Even though there are plenty of tools available to create videos of different types and styles, hardly any offer the scope of possibilities that Visme does.
For example:
If you’re ready to get started, head over to our video maker and create a video that will leave a lasting impression on your audience.
Design visual brand experiences for your business whether you are a seasoned designer or a total novice.
Try Visme for free
![12 Best Software for 3D Animation You Should Know [Free & Paid]](https://visme.co/blog/wp-content/uploads/2023/04/12-Best-Software-for-3D-Animation-You-Should-Know-Thumbnail-500x280.jpg)

About the Author
Orana is a multi-faceted creative. She is a content writer, artist, and designer. She travels the world with her family and is currently in Istanbul. Find out more about her work at oranavelarde.com