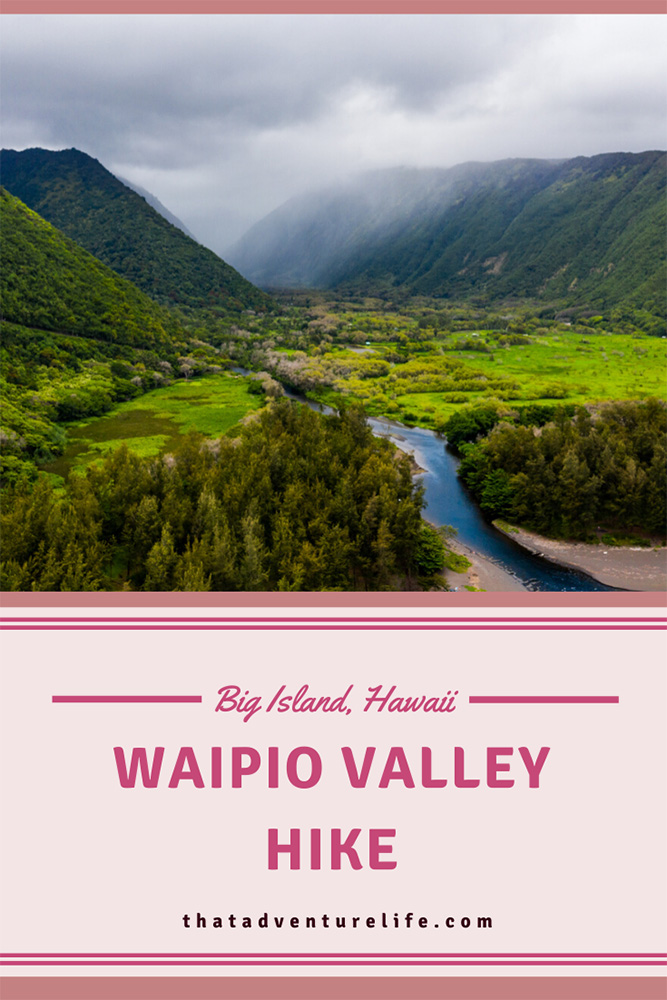
As one of the most beautiful places on earth, Waipio Valley also steeped in history and culture of Hawaii. These are a few of many reasons why it is also a very popular site for tourists. Although, most of the tourists will only stop at the lookout on the top of the valley. To get down to the valley floor, you’ll either need 4-wheel drive vehicles, go through a tour or willing to hike down a very steep road that is 25% grade. After 5 days of delicious Hawaii food and shave ice, we needed to take that hike down.
STATS:
Where:
Waipio Valley trailhead – Coordinates: 20° 7’3.35″N 155°35’0.71″W
Waipio Beach – Coordinates: 20° 7’9.05″N 155°35’21.10″W
Parking: There is a small parking lot at the trailhead and street parking. Please be respectful to the residents. DO NOT BLOCK THE DRIVEWAYS. If you have 4-wheel drive vehicles, there is a lot of parking on the beach. Driving down this road may be a violation of your rental car agreement.
Restrooms: There are restrooms near the lookout and port-a-potties down near the beach.
Fee: This hike is free.
Distance: 0.8 miles from the trailhead (top) to the road split (the bottom of the valley). From the split, it is 0.5 miles to the beach.
Elevation Gain: About 900 ft gain in less than a mile.

Level: Moderate. While the road is extremely steep, but it is in pretty good shape.
Estimated Completion Time: 2.5 hours – all day. It all depends on which areas you want to explore and how long you want to spend at the beach.
Ideal Weather: Cooler weather will make this monstrous hill a little bit easier. There are very little shades on the steep way down.
Ideal Time: The trail gets really busy and hot. There is a lot to do down in the valley as well. Therefore, morning times are the best time to go.
Dog-friendly: Yes, but please bring plenty of water for you and your pup.
THE ADVENTURE:
We left our rental house in Kona bright and early to start our 1.5 hour drive to the Waipio Valley Trailhead. It is a really pretty drive that winds its way through Kalaoa and Wiamea. You go through areas that look like tropical farmlands and beautiful rain forests. GPS should be able to take you there. Just make sure to map it either to the Waipio Valley Lookout or use the coordinates to the trailhead above.
There is a guard at the beginning of the trailhead, next to the parking lot. If you’re planning to drive down that road to the bottom of the valley, you’ll need to have 4-wheel drive vehicles. Driving down this road may be a violation of your rental car agreement. The guard will inspect your vehicle to make sure that it has 4-wheel drive and enough ground clearance. AWD vehicles will not be allowed on the hill. We seriously don’t think that a 2-wheel drive could possibly make it back up the hill. If you’re going to make that drive, remember to share the road with other vehicles and hikers. Remember, the cars that are going up the hill have the right of way. Make sure to stop and let them pass first.
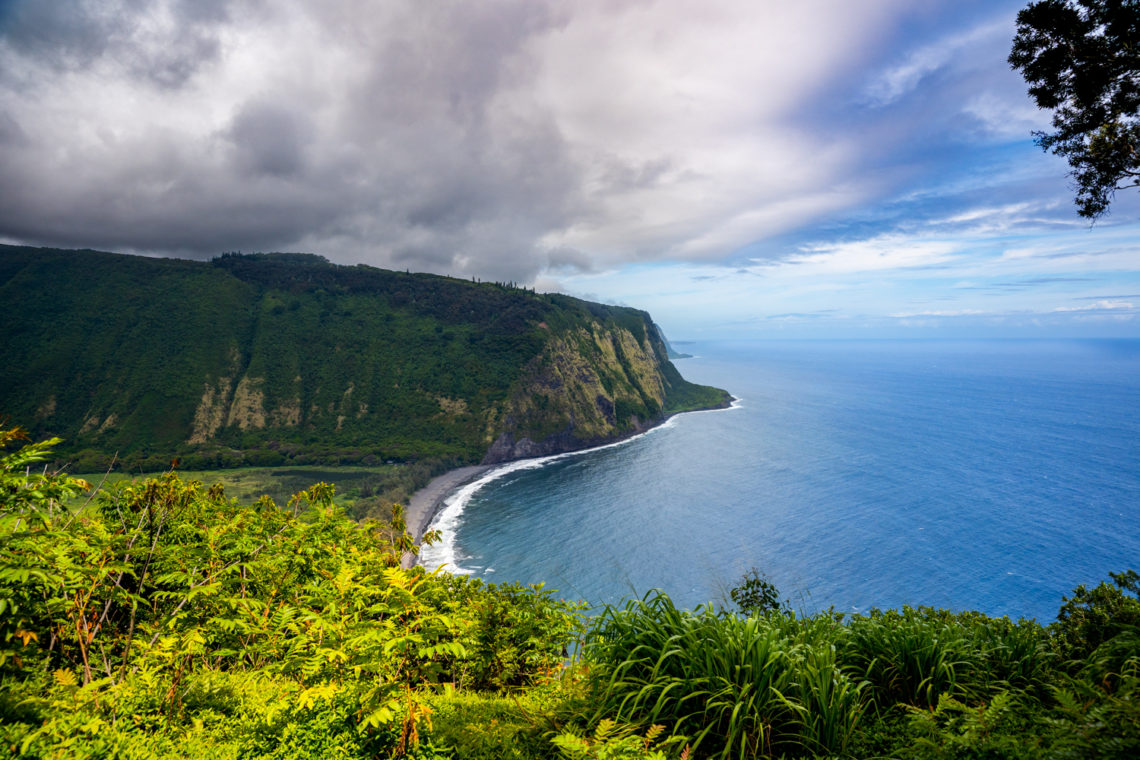
By the time we arrived, the small parking lot was full. Luckily, we found a parking spot on the street not too far from the trailhead. We made our way down to the lookout first to use the restroom and to check out the expansive valley beneath. From here, you’ll get an almost aerial view of the stunning valley and beach below. There are also a few informative signs here about the area that includes much of the valleys mythology. On clear days, you can see the island of Maui barely peeking around the corner of the 2,000 ft tall cliffs on the other side of the valley. The steep cliff walls that you see are also home to the burial caves of the kings from long long ago, hence its nickname “The Valley of the Kings”.
From the lookout looking down the valley, you can walk over to the paved road on your left-hand side to start your hike instead of going back up. As soon as we walked past the guard tower, we got our first glance of what we were in for. This hill is a beast. There is a sign at the top, boasting of a 25% grade average, with steeper grades in some sections. In fact, this is the steepest road of its length in the United States.
Even though it is less than a mile long, this hill is VERY brutal with 800 ft in elevation. This hill is almost completely exposed so it will get very warm. It is deceiving because the hike down won’t feel like it’s that big of a deal. However, the hike up is monstrous. MAKE SURE TO BRING A LOT OF WATER! We can’t stress enough the importance of bringing more than enough water. You will thank us. We ran into a family of four that were hiking down the road with only one can of Hawaiian Sun juice each. Even with our advice to go back, they decided to keep going. Needless to say, we caught them suffering on their way back. We ended up giving them some of our water and kept going. I think they made it back to their car, hopefully.
Despite how steep it is, the trail is actually very easy to follow. You pretty much just follow the paved road all the way down to the bottom. The trail curves around a few times. There are fruit trees such as mangos, papayas, avocados growing along the way. This makes me very happy. Make sure to keep an eye out for cars when hiking down this road. A lot of cars are driven by tourists who have no experience with a 4-wheel drive or driving down a road this steep.
As you hike down the road, the view of Waipio Valley gets better and better. From the top, you see the ocean, its coastline and glimpses of the valley. As you hike down, the valley opens up with its winding river, taro patches, and little houses. At the steeper section, there are deep grooves carved into the road to help with traction. The road gets narrow at certain parts so make sure to keep to the valley side of the road to give the cars some extra room.
Once you get to the bottom of the hill, the road splits up to either left or right. If you make a right here, it will take you to the gorgeous black sand beach and the start of the very strenuous Muliwai Trail. Turning left here will take you deep into the valley. You might get a glimpse of wild horses along the river and the view of Hi’ilawe Falls. However, the entire back of the valley and Hi’ilawe Falls are either private property or require you to cross private property. Despite what you’ve heard, the roads leading to the back of the valley are not public rights-of-way. It is only legal to walk down to the beach and back. The beach is public land.
It is a 0.5-mile hike to the beach. This is more like a leisurely stroll since the road is flat. The little section here is beautiful. You’ll find yourself on a dirt road with lush green vegetations on each side, surrounded by big tree arches, wild kalo (taro) plants, fruit trees, and the winding river on your left. I also found my childhood favorite plant, the tickle me plant (Mimosa pudica) along the road. Tickle me plant closes its leaves when you touch it. The dirt road here can get very muddy when wet. Watch your step through here, especially when cars come splashing though.
There are several forks throughout the road. Just keep walking toward the beach and you won’t get lost. Make sure to stay off private properties and be respectful to the residents and their property. While it is our vacation, this is their home.
At last, we arrived at a little forest of tall trees in front of the beach and plenty of parking for cars. While it is technically a black sand beach, the jet black lava sand has since been diluted and mixed in with the beach sand. This gives it a bit more of a gray appearance. It was definitely not as black as Punalu’u Black Sand Beach. But that did not take away from its beauty one bit.
From our research, we know that there’s supposed to be a waterfall pouring out to the ocean on the right if you’re facing the ocean. If you follow the beach that way, black sands turn into large jagged boulders. As we headed that way, the short little hike turned out to be a lot more difficult because of all the rock scrambling. It required careful foot placement and almost circus-like balance. Some rocks weren’t very stable and wobble when you stepped on them. Others were slippery. These are all lava rocks so you’ll get cut up if you’re not careful. DO NOT GO THIS WAY IF THE TIDE IS HIGH!
The long stretch of boulders went on for what felt like an eternity. It disappeared around a long curve off to the right. There were several points where we were like “I don’t see anything, should we turn back?” However, our stubbornness kept kicking in as we pushed further. Our finish line was the giant boulder right before the curve off. That was where we decided to turn back if we couldn’t find the waterfalls. We trudged on, hopping from one boulder to the other, making our way to our finish line. As we climbed on top of the giant boulder, we were almost nervous to look for fear of disappointment. But to our surprise, there it was! About 0.5 miles in the distance, the waterfall stood there proudly, pouring water from a high cliff, directly into the ocean.
The waterfall wasn’t the biggest one, but it was beautiful. Depending on the rain, it can get a lot bigger. You can actually hike to the bottom of the fall. However, we decided to head back from here after taking tons of photos. We wanted to explore other areas as well. After what felt like hours scrambling on rocks, it felt amazing to be back on the sand.
We followed the coastline toward the other side of the valley. As tempting as it may be, the currents are supposed to be very rough here. Therefore, swimming is probably not a good idea. Something pretty funny happened as we reached the halfway point of the beach. We came to the spot where the river that runs through the valley pours out into the ocean. As we looked around, we realized that the beach is actually curved. Because of this, we could see the waterfall that we were chasing after from here. We both got a small case of the giggles when we saw it and realized how much work we had put into looking for it. All this time, we could have just taken a leisurely stroll down the beach to see it.
The river was flowing quite strong that day so we decided not to cross. There were a few people crossing over, however, they looked like they were struggling. A couple of people almost get swept downstream and into the surf. Water shoes will be helpful here because the rocks are very slippery and you don’t want your hiking shoes to get wet. Again, please be smart and do not cross if the water is high that day. It’s definitely not worth getting hurt. On the other side of the river is the Muliwai Trail, a very strenuous hike that will take you up the side of the cliff. This hike has the elevation of 2100 ft. The views are supposed to be amazing. A local recommended that if we were to attempt that hike, we need to drive down to the bottom instead of the hike down, and get here early.
After a short rest, we decided to head back and began our battle with the beast. There is no warmup because the intense grade kicks in almost immediately. Our heart rate began to rise, our breathing became heavy. Sweat began to appear on our foreheads as we slowly ascended the beast. We saw happy hikers trotting down, seemingly clueless about the fact that what goes down, must come up in this case. One huge benefit to the climb is that you have tons of stunning viewpoints to stop at and catch your breath.
After what felt like years of climbing up the hill (it was about an hour), we finally saw the finish line. We dropped our heads down and made one final push for the top. Finally, we conquered the mountain! Don’t let all of this scare you though. It may be a tough hike, but that doesn’t stop thousands of people from doing it every year. If you run out of gas on the way back up the hill, you might even be able to offer a local some cash for a ride back up to the top.
We definitely recommend actually going down to the bottom of the valley. It’s definitely an unforgettable experience. If you’re staying for a few days on Big Island, check out our top 10 things to do on Big Island. Don’t forget to check out Two Step for some awesome snorkeling. If you’re close to Hilo, don’t forget to stop by Kaumana Caves for some unique lava cave exploration.
You can also hear Dustin talk about some of our favorite things to do on the Big Island on the Between The Mountains Podcast
Happy Adventuring. Don’t forget to follow us on Instagram, subscribe to our Youtube channel, and sign up for our newsletter!
RECOMMEND GEAR:
Don’t forget to check out our Recommended Gear section as well.
• Good hiking shoes with a lot of treads.
Vy’s shoes are North Face HedgeHog GTX.
Dustin’s shoes are Coleman Tasman Hiking Shoe.
• At least one full lunch and plenty of snacks
You’ll definitely want to spend most of your day down there so lunch and snacks would be wise.
• Sunscreen:
We use eco-friendly, reef-safe sunscreen, All Good Organic Sunscreen Butter – Zinc Oxide – Coral Reef Safe and All Good Sport Sunscreen Lotion – Coral Reef Safe (3 oz)(2-Pack) or Stream2Sea SPF 30 Reef Safe Sport Tinted Sunscreen.
• At least 100 oz. of water.
Water is extremely important for this hike! Vy uses the Camelback L.U.X.E. Dustin uses the Clik Small pack (sadly Clik is no longer around)
• Towels and beach gears
If you want to spend time on the beach. Remember though, unless you’re driving down, you do need to carry them back up.
• Water shoes
If you want to cross the river over to the other side of the beach, we recommend bringing water shoes. Vy uses UBFEN Women’s Water shoes. Dustin has UBFEN Men’s Water shoes.
• Hat
The hike is exposed. A hat will help.
CAMERA GEAR:
• Camera:
Sony a7 III
Gopro Hero 7 Black
• Lenses:
Sony 24 -70mm f/2.8 Carl Zeiss Vario Sonnar T Zoom Lens
• Accessories:
Bobber – Floating Hand Grip for GoPro HERO Cameras
• Drone:
Mavic 2 Pro Combo